
Sew Box
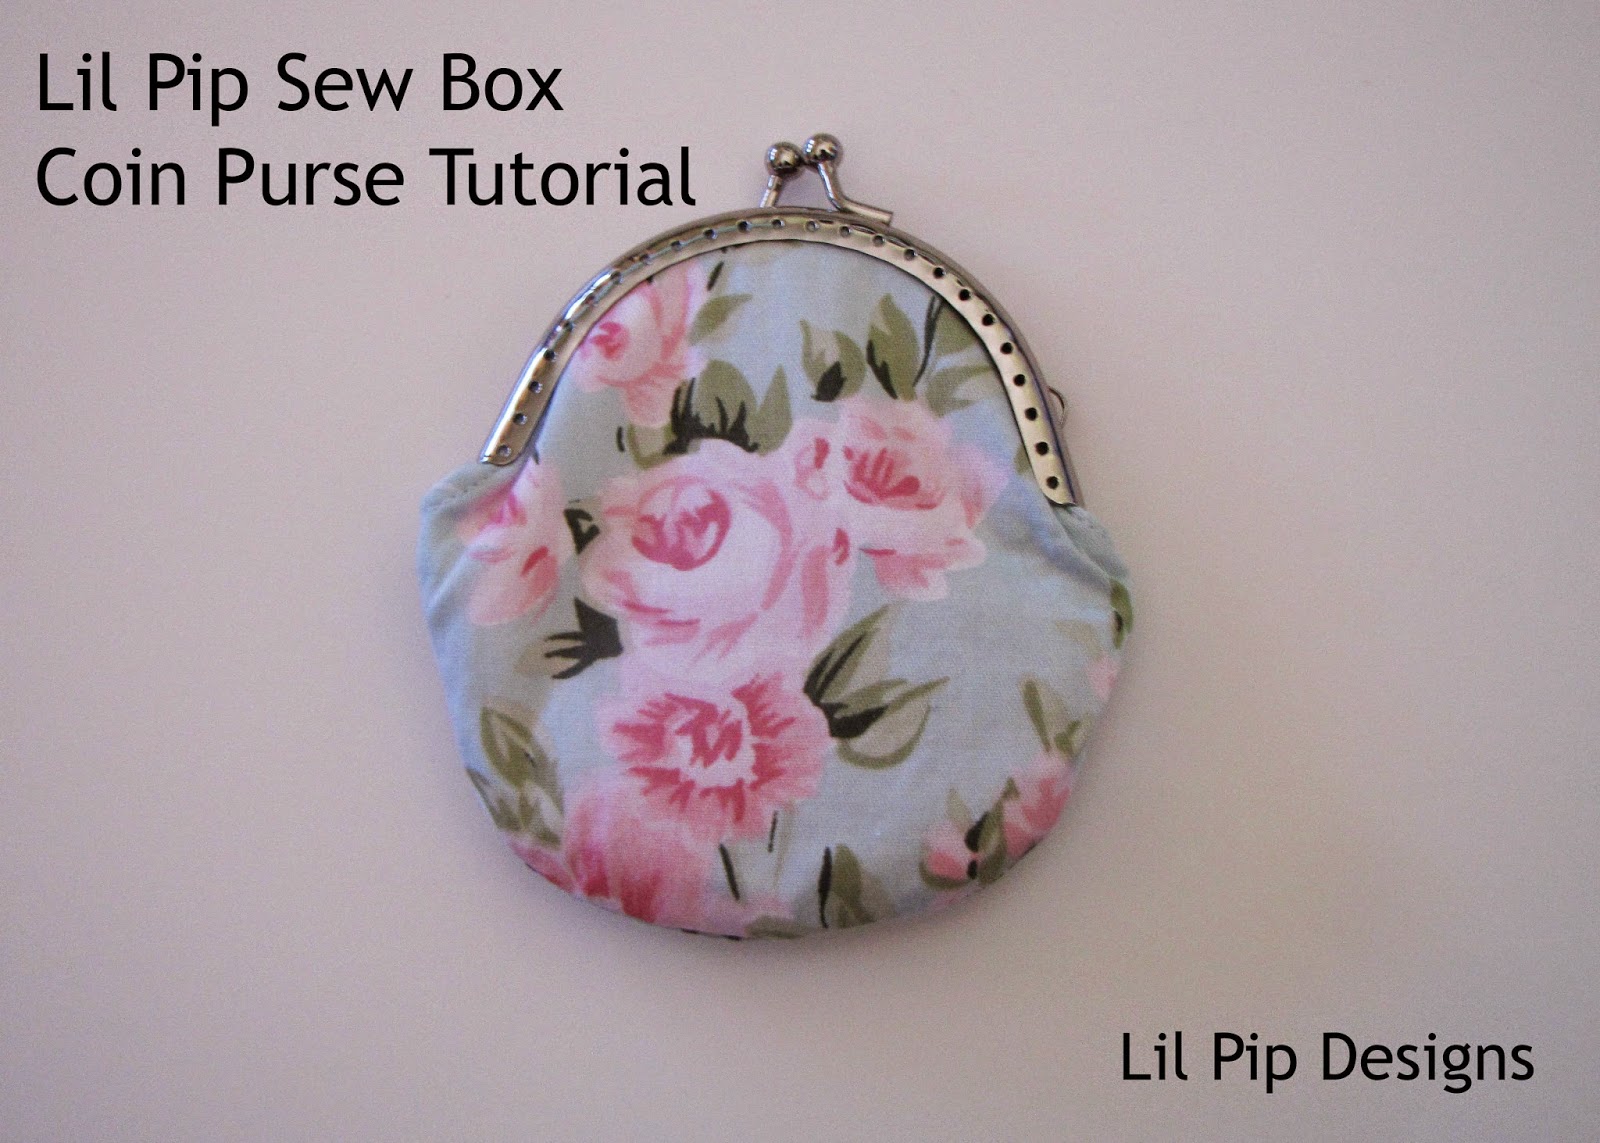
Lil Pip Sew Box Metal Frame Coin Purse Tutorial
Today I’m very excited to bring you a tutorial I’ve been working on for a few weeks. When Leesa from Sew Box Subscriptions asked me to create a tutorial for a metal frame purse, I thought ‘sure why not?’. It is always something I have wanted to make but not something I have ever seen a pattern for. I now know why. You see every metal frame is different. Different sizes and different shapes. Plus either sew-in or glue. So essentially, depending on what you buy, you need to create a bespoke pattern for each one.
Lucky for the subscribers to the February Sew Box – I’ve done all the hard work for you with the pdf pattern provided. If you would like to try to make your own pattern, I have a list of resources at the bottom of this tutorial.
Today I will show you how to make a little coin purse. Tomorrow, I will show you how to make the bigger medium clutch with square bottom. Next week, I will show you all different examples and variations in what you can create. I’m calling this – Lil Pip Sew Box Purse week!
If you make one, be sure to share on social media (I love Instagram!) using the hashtag #lilpipsewboxpurse or send me an email. I can’t wait to share your examples. Check out my Pinterest board for more ideas.Lil Pip Sew Box Coin Purse
You have two options with the coin purse – round base or square base. Here I show you round base but the instructions are the same. Stay tuned for a super cute (possibly my favourite!) version with the square base in the next few days.
Step 1: Gather your supplies. You’ll need:
- Metal frame (these were available exclusively in the February Sew Box Subscriptions)
- Small pieces of fabric for outer and inner purse
- Heavy iron on interfacing or you could use fusible webbing
- Usual notions, threads, scissors etc
 |
| Gather your supplies |
Step 2: Cut out your fabric, taking care with fabric placement and iron on your interfacing. You can choose to have the fusible webbing on the outer fabric and leave the lining without any or use heavy interfacing on both as I have done here.
 |
| Cut and iron on interfacing |
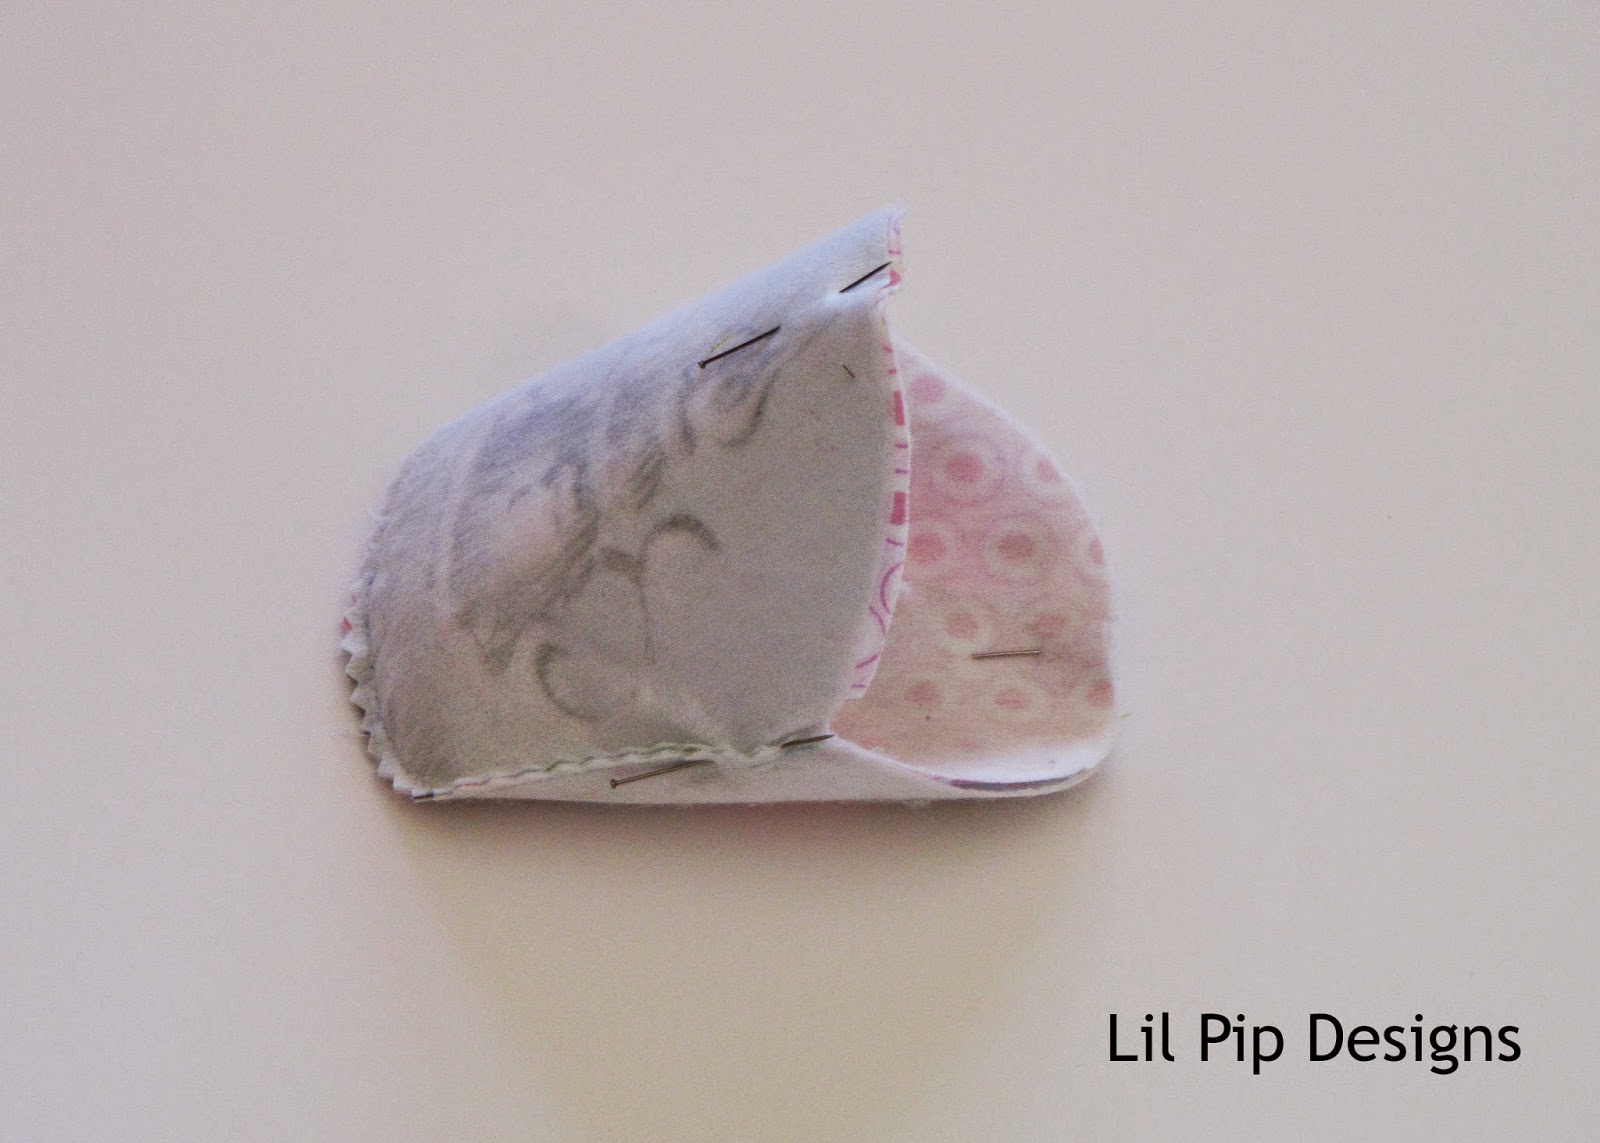
Step 3: Sew around the outer purse leaving the top open. Use a 3/8″ (edge of my foot!) for all seams throughout. Sew around the lining leaving a 1.5 – 2 inch turning gap. Trim back with pinking shears or clip the seams (take a look at this awesome post on Sew Mama Sew to explain why!)
 |
| Sew, trim and leave a turning gap |
Step 4: With right sides together (RST) insert your lining into the outer (or outer into your lining!) taking care to match the side seams.
Step 5: Sew around the top completely. Take it slow as this is a little purse and those side seam points are tricky. Best to stop at the side seam, leaving your needle down and pivot the fabric, lower your foot and continue sewing.
Step 6: Trim the seams back with pinking shears or clip the seams. Turn your purse right way out through your turning gap.
 |
| Match side seams carefully and sew around |
Step 7: Pin and sew your turning gap. You can hand stitch or just sew close to the edge. As this is hidden inside, I usually just machine stitch. I’m kinda lazy like that!
Step 8: Push your lining fabric back inside and iron your top curve carefully. Top stitch as close to the edge as you can. If you aren’t confident, you could skip this step but it stops it moving around for the next step.
 |
| Sew up your bottom turning gap – hidden on the inside |
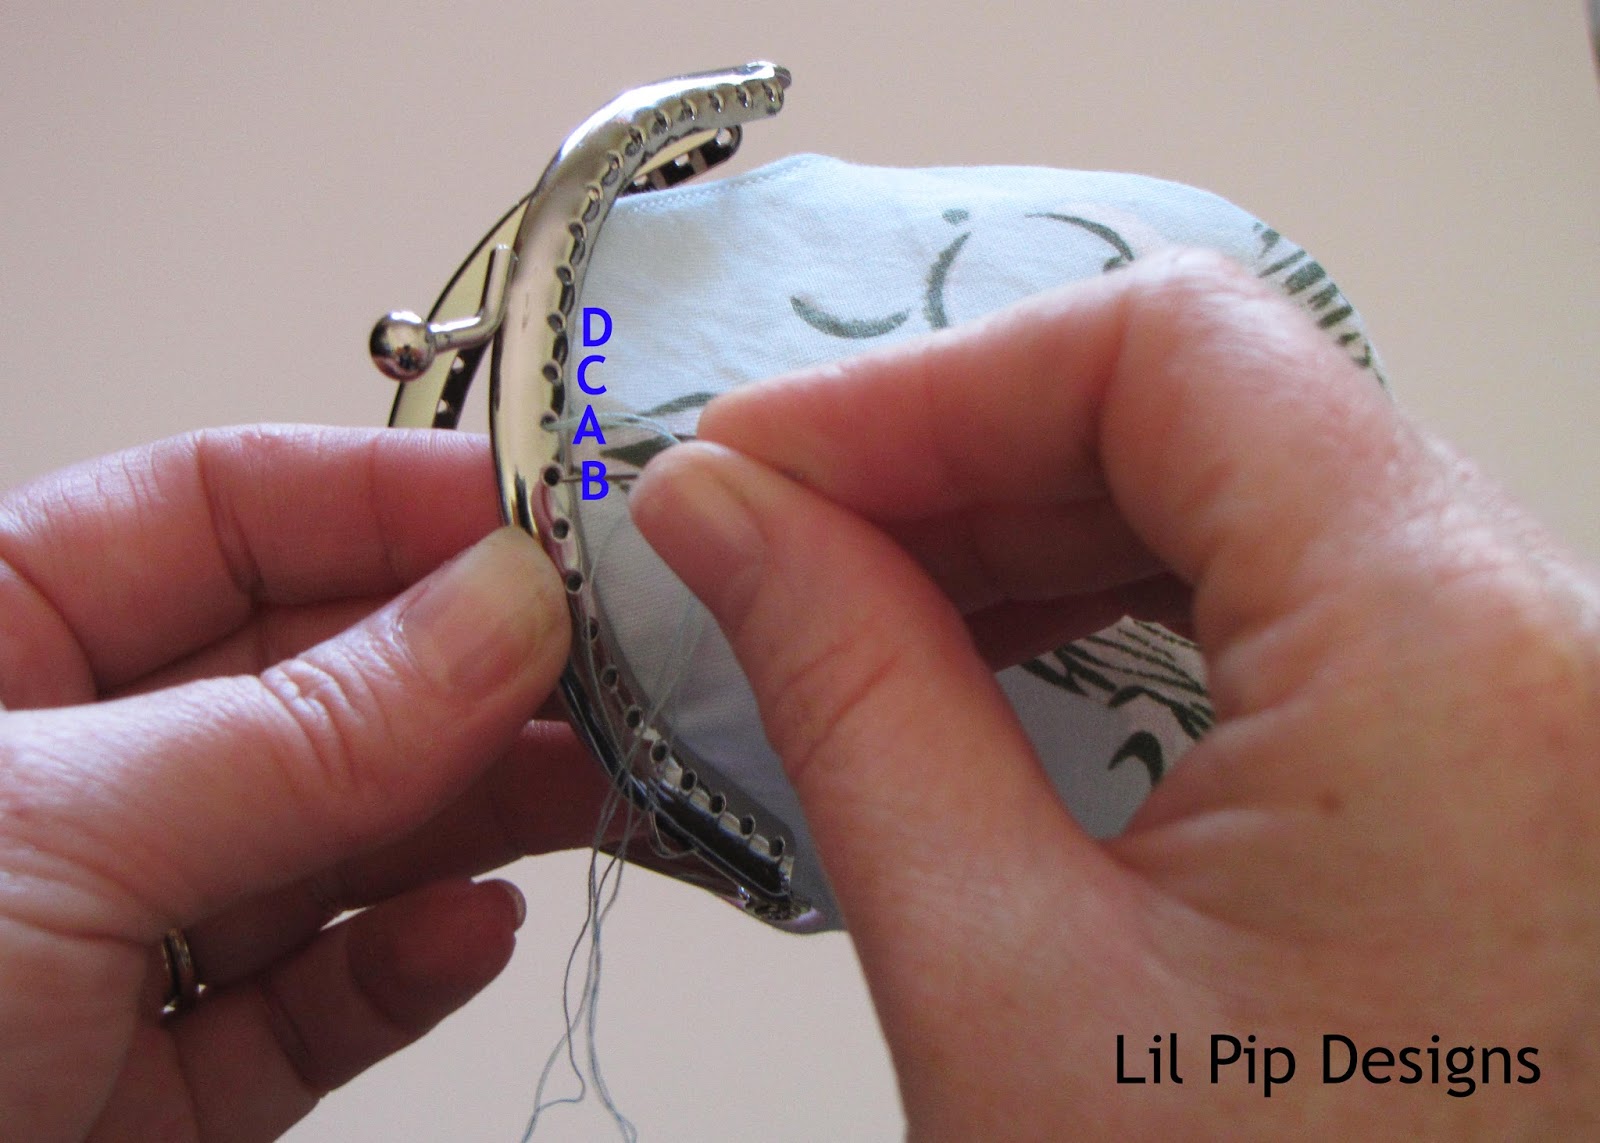
Step 9: Now for possibly the most time consuming part of this entire project – hand sewing the metal frame around the top. Find the centre point on both sides of your purse. Match to the centre point of your frame. Start in the middle and work to one side, then do the other side and repeat on the reverse. This ensures you don’t end up with a wonky purse. I recommend back stitch which I have tried to show here (or check out a better demonstration by my bloggy friend Vicki at LeftHandedNotions). Starting at point A, bring your needle up and down in point B. Bring your needle up at point C and back in at point A. Bring it up at D and back at point C. Continue to the end.
Your purse is now complete. Stand back and admire what you have created!

Resources:
- Cailamade – Make your own metal frame clutch pattern
- Flutter Kat – Framed purse Tutorial
- Dixie Mango – Coin purse tutorial (good suggestions if you have the glue in variety)
- Guthrie and Ghani – How to draft your own pattern to make a metal frame purse

Don’t forget to share on social media (I love Instagram!) using the hashtag #lilpipsewboxpurse and check back tomorrow and throughout next week for other examples.